Extending WordPress Blocks Basics


The Gutenberg editor replaces the core editor in WordPress version 5, and is seen as controversy by many. But with most change comes resistance. For what's worth, I think it's a pretty good change so far, just takes some getting used to. Let's take a look at some basic modifications you can do extend the core WordPress blocks.
Developing A Basic WordPress Plugin
We'll approach this from the stand point of a plugin, but you can also do this in your theme as well. I like approach of a plugin since we're customizing some core aspects that could be present regardless of what theme you use, but that's just my preference here.
The primary means of extending WordPress is the plugin. The WordPress Plugin Basics documentation provides details on building a plugin.
Go to your favor IDE or text editor, open up a new directory and and call it: my-custom-blocks. The create a new php file called my-custom-blocks.php. Lets add this code to the to of the file so WordPress recognizes it as a plugin:
<?php
/**
 * Plugin Name:       My Custom Blocks
 * Description:       Doing some awesome customizations yo!
 * Version:           1.0.0
 * Author:            Your Name
 * Author URI:        https://example.com
 */
Now we need to enqueue some good ol' JavaScript. Gutenberg Editor is built on JavaScript/React.js and we are going to hook into that. This methodology follows the standard WordPress procedure of enqueuing scripts. So the next step is to add the following code to your my-custom-blocks.php file below the initial comments:
// Enqueue our plugin JS
function my_custom_blocks_enqueue() {
    wp_enqueue_script(
        'my-custom-blocks-script',
        plugins_url( 'my-custom-blocks.js', __FILE__ )
    );
}
add_action( 'enqueue_block_editor_assets', 'my_custom_blocks_enqueue' );
Here, the enqueue_block_editor_assets hook is called when the block editor loads, and will enqueue the JavaScript file my-custom-blocks.js at the correct time. So that means we need to create the file next:
Create a file within your plugin directory called my-custom-blocks.js and add this to start:
console.log( "Hey! I'm customizing your blocks broh!!1!!1" );Just one more file to create for now, a my-custom-blocks.css. This is where we'll load in the block styles we want to extend. Go ahead and create that in the plugin folder as well, but just leave it empty for now (we'll add styles later). But like the JavaScript file, we need to add in the plugin's stylesheet. Add this code below the enqueue_block_editor_assets add_action() hook:
// Enqueue our plugin CSS
function my_custom_blocks_stylesheet() {
    wp_enqueue_style( 'my-custom-blocks', plugins_url( 'my-custom-blocks.css', __FILE__ ) );
}
add_action( 'enqueue_block_assets', 'my_custom_blocks_stylesheet' );
Alright, so now that we've got some placeholder code down, let's take a look at it in action. Your my-custom-blocks folder should have 3 files in it:
my-custom-blocks.phpmy-custom-blocks.jsmy-custom-blocks.css
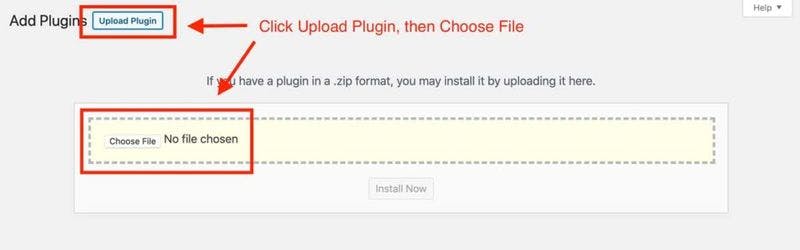
Zip up and compress the folder. Then navigation to your plugins page within your WordPress install, click Add New, then Upload Plugin. Select if rom the file select, then click Install Now.
Click Activate afterward and your plugin will now be loaded within WordPress. Go ahead and create a new Post. If you are in Chrome, open up your Chrome Dev Tools to check the console. If not, use FireFox. If you are new to Chrome Dev Tools or other browser developer tools, check out Mozilla’s “What are browser developer tools?” and give a read. And understanding of hows work is pretty vital to any web development.
Ok, let's go ahead and verify that our block script has loaded. you should see glorious statement we placed in our script in the your browser tools console now.
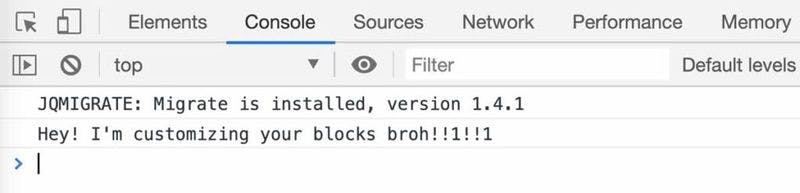
Unfortunately, You'll probably see that jQuery Migrate too... but that's a different topic.
So let's recap really quick. So far we have a basic plugin we created by putting a PHP file and a JavaScript file that it enqueues in a folder. We compressed it and uploaded to WordPress, which honors it as a plugin. After activating, we see that the script we included in the plugin loads where we want it to, in the Block editor. Great! This puts all the core components we need to do some basic extending of the block editor. Continuing on...
Extending the Block Editor
We're going start by going over one of the simple examples that the WordPress developer handbook gives you to add a style to the existing Quote block. To do this we are going to "cheat" a little, and use the WordPress Plugin Editor. This is NOT recommended to do in production sites, but since we're just testing this new super sweet block extension plugin, we'll look the other way.
To edit the plugin from with in your WordPress environment, go to Plugins > Plugin Editor from the main admin sidebar menu. Then from the top left dropdown labeled "Select plugin to edit: ", select My Custom Blocks.
The page should refresh and you'll see 3 files to choose from. Select the javascript file. After the file loads, underneath that awesome console.log() statement in your my-custom-blocks.js, file add this:
wp.blocks.registerBlockStyle( 'core/quote', {
    name: 'super-quote',
    label: 'Super Quote'
} );
Now instead of just a console log we are using a function from the wp.blocks package, so it must be specified as a dependency when enqueued. All that means is that its dependencies need to be loaded in first before the script can use them, so it is loaded in the correct order. Update the function in the my-custom-blocks.php file to this:
function my_custom_blocks_enqueue() {
    wp_enqueue_script(
        'my-custom-blocks-script',
        plugins_url( 'my-custom-blocks.js', __FILE__ ),
        array( 'wp-blocks' )
    );
}
add_action( 'enqueue_block_editor_assets', 'my_custom_blocks_enqueue' );
Take a look at the last argument in the wp_enqueue_script() function, array( 'wp-blocks' ). It's an array of dependencies (in this case just one). WordPress makes packages available under the wp namespace and in the example, wp.blocksis used to access the items that the blocks package exports, hence its a dependency. Here's a list of available packages and what objects they export, for some light reading.
Now that we have registered a new style class option for the Quote block, we need some actual styles to go along with it. From the Plugin Editor select the CSS file we created: my-custom-blocks.css. Add the follow CSS code and click Update File:
.is-style-super-quote {
    color: purple;
    font-size: 2em;
}
After you have updated the JavaScript, PHP, and CSS files, go to the block editor and create a new post. We'll see our newly extended block in action.
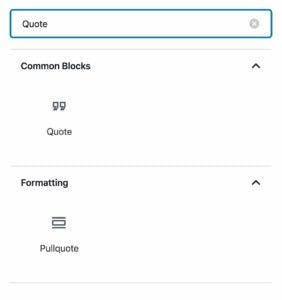
Add a quote block, and while the block is still selected, in the right sidebar under Styles you will see your new Super Quote style in the list.
Click the Super Quote to select and apply that style to your quote block. Now you can save it and click Preview to see all your hard work live.
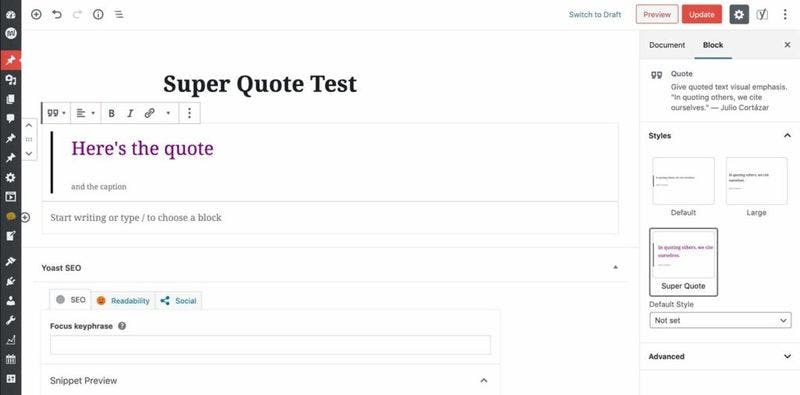
There she blows, in all her purple glory...
Congrats! You just modified your blocks.
And that's it! There's the basics. Go ahead and download the source code here for reference if you'd like. In a future post I'll go into more details and customizations.